First step is to build a Linux Server, deploy Docker and configure a certificate.
Create Linux Server
I decided to setup a Linux server my Azure tenant and followed this guide from Microsoft: Create a Linux VM in Azure with multiple NICs – Azure Virtual Machines | Microsoft Docs
Create FireWall ports
After the machine has been created I opened the necessary Firewall ports:
az network nsg rule create --name allow_tcp_443_inbound --resource-group myResourceGroup --nsg-name myNetworkSecurityGroup --access Allow --destination-port-ranges 443 --direction Inbound --protocol tcp --priority 102

az network nsg rule create --name allow_udp_443_inbound --resource-group myResourceGroup --nsg-name myNetworkSecurityGroup --access Allow --destination-port-ranges 443 --direction Inbound --protocol udp --priority 103

az network nsg rule create --name allow_tcp_22_inbound --resource-group myResourceGroup --nsg-name myNetworkSecurityGroup --access Allow --destination-port-ranges 22 --direction Inbound --protocol tcp --priority 104

az network nsg rule create --name allow_tcp_443_outbound --resource-group myResourceGroup --nsg-name myNetworkSecurityGroup --access Allow --destination-port-ranges 443 --direction Outbound --protocol tcp --priority 202

az network nsg rule create --name allow_tcp_80_outbound --resource-group myResourceGroup --nsg-name myNetworkSecurityGroup --access Allow --destination-port-ranges 80 --direction Outbound --protocol tcp --priority 203
Set Public IP Address
Next thing is to set the public IP address of the virtual machine to Static.
- Login to the Azure Portal
- Find the VM between your resources
- Select the Public IP address
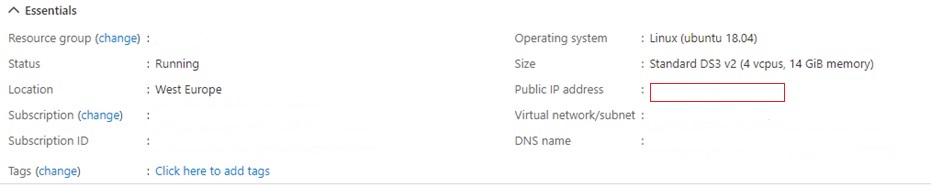
4. Clicking on the IP address will give the ability to set a static IP address. Select Static and click save.

Install Docker
Connect to the virtual machine with SSH and install docker:
# Login with SSH
ssh azureuser@<public-ip>

# Install Docker
sudo apt-get update

sudo apt-get install apt-transport-https ca-certificates curl gnupg-agent software-properties-common

curl -fsSL https://download.docker.com/linux/ubuntu/gpg | sudo apt-key add -

sudo apt-key fingerprint 0EBFCD88

sudo add-apt-repository "deb [arch=amd64] https://download.docker.com/linux/ubuntu $(lsb_release -cs) stable"

sudo apt-get update

sudo apt-get install docker-ce docker-ce-cli containerd.io

sudo docker run hello-world

sudo apt-get update

sudo apt-get upgrade
Install FTP
In order to be able to upload the certificate an FTP server needs to be installed.
# Install vsFTPd
sudo apt install vsftpd

## Adjust vsftpd config
sudo nano /etc/vsftpd.conf
Adjust or add the following in the ftp configuration:
listen=YES
listen_ipv6=NO
write_enable=YES
chroot_local_user=YES
user_sub_token=$USER
local_root=/home/$USER/ftp

pasv_enable=YES
port_enable=YES
pasv_min_port=10000
pasv_max_port=10100
pasv_address=myftpservervm.cloudapp.net
pasv_addr_resolve=YES
seccomp_sandbox=NO
allow_writeable_chroot=YES
# restart vstfpd
sudo systemctl restart vsftpd
Configure Firewall ports for FTP:
az network nsg rule create --name allow_ftp --resource-group myResourceGroup --nsg-name myNetworkSecurityGroup --access Allow --destination-port-ranges 20 21 10000 10100 --direction Inbound --protocol tcp --priority 105
Create a FTP user
# add user for ftp
sudo useradd -m username

# Set a password
sudo passwd username

# create an FTP folder
sudo mkdir /home/username/ftp

# set permissions for the user
sudo chmod 777 /home/username/ftp
Certificate
I have created a new certificate vpn.domain.com and created a DNS A-record for vpn.domain.com with the public IP address of the virtual machine.
As for the certificate, it could be in *.pem format or *.pfx format. The *.pfx was the one that worked for me. So I had to convert the certificate to a *.pfx format. make sure that the name is site.pfx and upload it.


